Monday, May 4, 2009

How-to: Photoshop a Design onto a T-shirt

120 TShirt Final

Here's how you take a logo or design and project it onto a blank t-shirt using Photoshop. I used PS CS4, but I'm pretty sure all the tools you need are in earlier versions of PS as well.

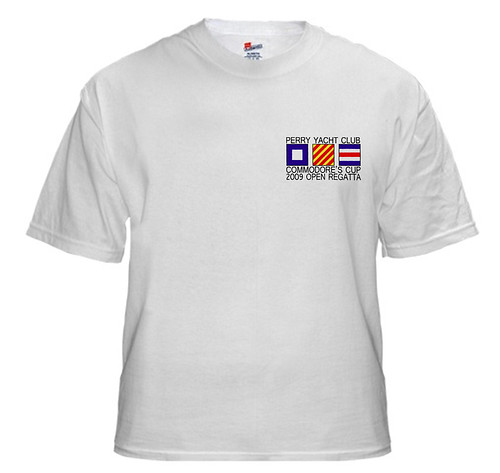
This how-to picks up after you've created the design you're wanting to put on the t-shirt. I created the above design using Photoshop for Perry Yacht Club's annual Commodore's Cup Regatta.

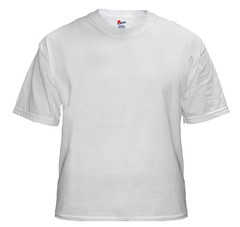
After creating the design, I needed a photo of a blank white t-shirt. I googled and found a front and back of a white t-shirt at www.ask-kalena.com. These are a little smaller than I wanted, but are a good place to start. I was surprised at the dearth of good blank t-shirt images on the internet.

The first thing I did was to resize the image of the t-shirt, making it bigger so there was a little more room to work with. I kept the same dimensions in inches and pushed the dpi from 76 to 150.

Here's the blank t-shirt:

The next step is to create the displacement map. A displacement map is a grey scale image saved in PSD format. PS uses the displacement map to create the contours used in distorting the image file.

It took several tries to create a displacement map that works for the t-shirt blank. The instructions I found in a PS book specified apply a slight Gaussian blur prior to using the image as a displacement map. The image of the t-shirt blank was already pretty soft, so I found it worked best without applying a blur.

To make the map, I first duplicated the blank t-shirt. I then changed the Image Mode to Grayscale:

015 Image Mode to GS

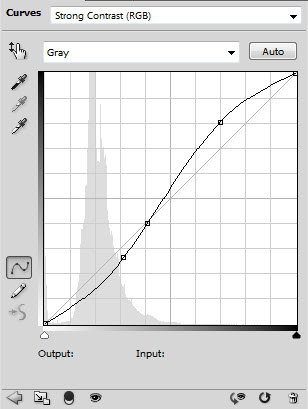
To boost the contrast, I applied a Strong Contrast Curve Layer:

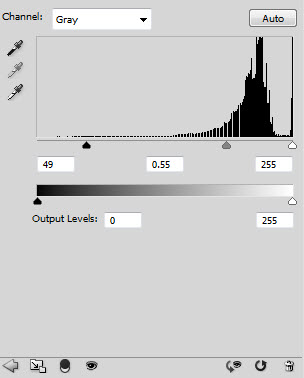
and added a levels layer to darken and add additional contrast:

Here's the adjusted grayscale image:

040 Adjusted for Map

Make sure you save the grayscale image as a .PSD file. Save it to a place you can easily find it later.

Now re-open the t-shirt blank and your design file. Place the design onto the t-shirt blank as a separate layer:

060 TShirt w Logo b4 displace

070 Layers Design&Bkgrd

Make sure the Design layer is selected. Then apply the Distort>Displace filter. Use small values for horizontal and vertical scales:

090 Displace Dialog

The filter will then ask for the image file you want to use as the Displacement Map.  Select the grey scale shirt you saved earlier as a .psd file.

Change the layer blend mode on the Design layer to "Multiply" and apply some USM:

110 USM

Here's a close up of the design after:

120 TShirt Final Closeup

Saturday, April 25, 2009

DIY Gutter Snoot and Grid Set

Snoot Project-16

I made a set of snoots and grids for my 580 EX II out of a length of vinyl gutter downspout. The downspout dimension is listed as 2" x 3" but is actually a little bigger. Nonetheless, the plastic connectors for the downspouts are a pretty good fit for the 580 EX II.

I wanted some flexibility with the set of snoots and grids. With a couple of snoots of varying lengths and a couple of grids with different baffle lengths I should have a lot of options in controlling the spread and quality of the light. I chose to make the snoots 7" and 4". The lengths of the baffles (black plastic straws) in the grids are 2" and 1". The set allows each of the components to be used individually and in combination. This results in a kit with a total of 8 possible configurations!

Here's the list of materials:
1 - 10' Length of White Vinyl 2" x 3" Gutter Downspout
2 - White Plastic Downspout Connectors
Black Plastic Drinking Straws
Flat Black Spray Paint (I had great luck with Krylon's Fusion for Plastic)
1 - Thin foam can coozy
Supplies and Tools:
Hacksaw (for cutting Downspout)
Paint Thinner (suggested prep for the spray paint)
Duco Cement (for gluing the straws)
Hot Melt Glue Gun and Glue Sticks
Scissors
Marker
Medium Grit Sandpaper (I used a sanding sponge)
Masking Tape (get the good, blue kind)
The first step is to cut the downspout into the desired lengths. I cut four lengths: 2" and 3" for the grids and 4" and 7" for the snoots.

Raw Materials

I found it difficult (even using a hacksaw) to make straight cuts. This means the ends of my snoots are not square and look a little ragged. If I used a miter box I probably would have had better results. After cutting the pieces, I sanded the ends. I wiped down the pieces with paint thinner as suggested by the directions on the spray paint can.

I was concerned that since the pieces fit very snugly into the connectors, a layer or two of paint would make the fit impossible. Top prevent needing to fit together two painted surfaces I masked off one of the surfaces. For the snoots and grids, I used 1" masking tape to mask the INSIDE of one of the ends of the cut downspout. I took one of the connectors, and masked off the OUTSIDE of the smaller end and the INSIDE of the larger end (this will be used to connect a snoot to a grid). On the other connector, I masked off only the OUTSIDE of the smaller end. This will be used to connect a snoot or grid to the strobe.

I sprayed all 6 pieces inside and out with the flat black paint. Two light coats worked well and gave good coverage. Drying time between coats was about 30 minutes or so. After the paint dried for a couple hours, I removed the masking tape.

The next step was to build the grids. I cut the black drinking straws into the desired lengths. I used 2" pieces for the 3" grid assembly and 1" pieces for the 2" assembly. You can use whatever lengths you'd like, but be sure to leave 1" for the connector to fit inside the grid assembly.

I used the Duco cement to glue the drinking straw pieces into the grid assembly. This cement is clear and fast drying.

The only thing left is fitting the flash connector to the flash head. I cut the coozy so I had a long strip about 1" wide. The Duco cement worked well to cement the coozy material into the inside of the flash connector. This layer of material provided a snug fit on the sides of the flash, but there was still some wiggle room on the top and bottom. To fill in this gap I cut additional 1" wide strips of coozy material and used the Duco cement to glue them to the first layer of material. The Duco cement didn't hold so I tried the hot glue gun. The hot glue did hold the second layer to the first. For the 580 EX II, the two layers work fine. The head of my LP 120 is slightly smaller and I think I'll make another connector with additional padding.

Here's a shot of the entire kit:

Snoot Project-17

Back Row (l to r):
  • 2" Grid
  • 4" Snoot
  • 7" Snoot
Front Row (l to r):
  • Flash Connector (note the coozy padding)
  • Snoot / Grid Connector
  • 1" Grid
Grids:

Snoot Project-10

Here's a closeup of the Grids. Note that the 2" Grid is mounted on the Snoot/Grid Connector.

Snoot with Grid Attached:

Snoot Project-11

This shows how Grids can be piggybacked on a Snoot. This shot shows the 1" Grid connected to the 4" Snoot using the Snoot/Grid Connector. The Snoot is also attached to the Flash Connector.